Showing posts with label blue. Show all posts

Monday, June 10, 2013

New Sinful Shine Polishes from Sinful Colors (Swatches and Review)

Hello Lovelies!


Now that my fashion week is over I am working on some fun things to share with you guys, but in the meanwhile I stopped at Walgreens a couple days ago and picked up some new polishes I wanted to share with you. I absolutely love Sinful Colors polish, it is cheap, it doesn't chip easily, and it comes in a lot of amazing shades. As I was browsing I came across a display featuring the new Sinful Shine which has gel tech to make the polishes appear glossy (found exclusively at Walgreens) so I decided to pick three of my favorite colors and test them out. I expected them to be amazing and of course they were. I painted my nails on Saturday with the pink shade called All the Rage and it's now Monday and they still look fabulous, no chips and they are nice and shiny. This polish is actually so shiny that when paired with my long nails they actually look kind of unreal, and they definitely look professionally done. The Sinful Shine polishes are a little more expensive then the regular ones but they are definitely worth it. I would love to have one of everything from Sinful Colors.
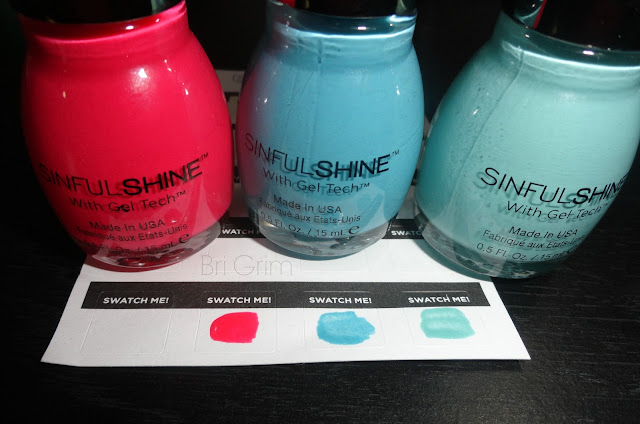
L to R: All the Rage, At Sea, and Rendezvous

Monday, April 15, 2013

Spring Bling: Nail look using shades of blue, gold, and 3D accents!

Hello Lovelies!

Here is a little spring inspired nail look I created using Sinful Colors All About You (the gold shade) and Sweet Nothing (the blue shade),3d accents and stickers from Kiss, and some gems from a craft store. 
How to:
1. Apply two coats of All About You on nails, let fully dry.

2.Apply a small strip of Sweet Nothing on Middle Nail, fully dry.

3.Apply a thin coat of Top Coat, I use Sally Hansen Strengthening Top Coat.

4.Apply stickers and top the nails you apply them to with another thin coat of top coat.

5.Apply gems with nail glue included in the 3D Charms nail kit using tweezers. I applied them randomly at the base of my thumb nail, and in a patterned strip on top of the streak of Sweet Nothing.

6.Let the glue fully dry then apply a thin coat of top coat over the gems, make sure it's as smoothly applied as possible so you don't have lumps around the gems.

7. Let them fully dry and you have a fun look for spring.


Amazingly enough I was able to get a full week out of this look before gems began to fall off and the paint started to slightly chip.